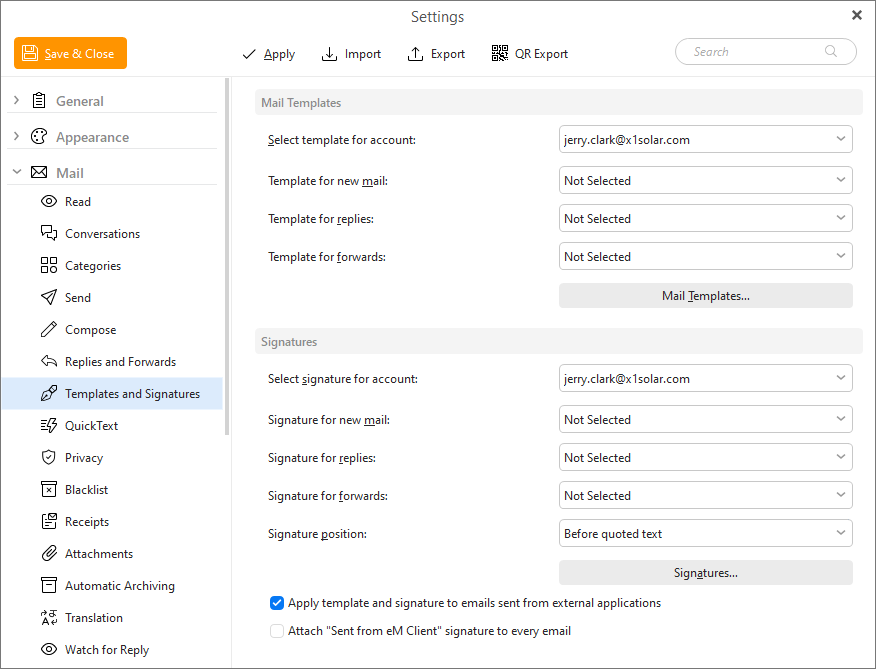
You can customize your mail templates and signatures in this section.
Here you can see how Templates and Signatures menu looks like:
By (un-)checking Attach signature to emails sent from external applications you can enable/disable attaching signatures to emails sent from external applications in this device.
By (un-)checking Attach "Sent from eM Client" signature to every mail you can enable/disable attaching this signature to every mail that you send.
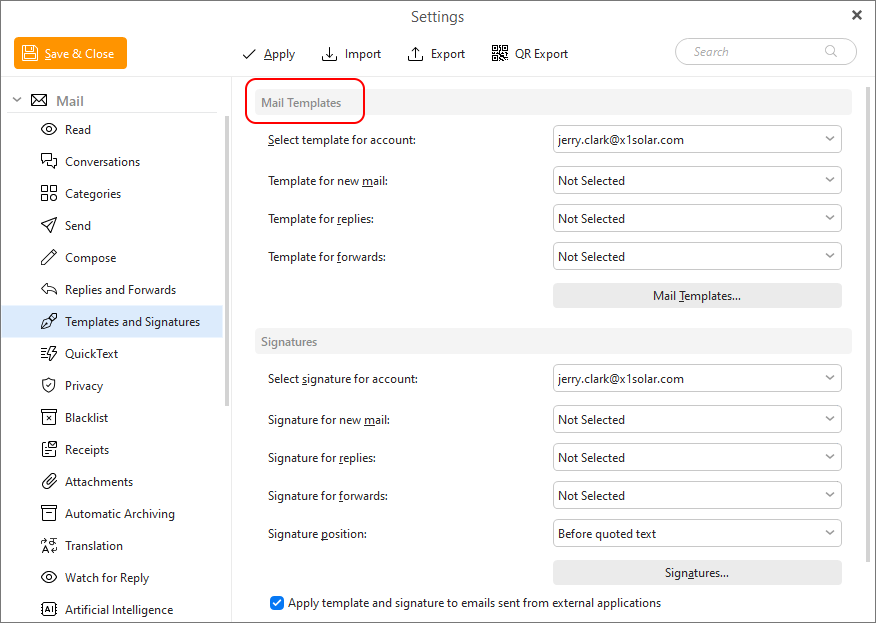
A Mail template is a set of font and color settings that you can first store and then collectively apply to your email messages. You simply choose your favorite type of font, color of background or even a picture for the background, store this information in the application's Templates window and the selected template will be automatically applied to all your future emails.
Select the account for which you want to use the mail template selected in the edit boxes below.
This drop-down menu contains a list of all your saved templates. Select one to be used for all the new messages you create.
This drop-down menu contains a list of all your saved templates. Select one to be used for all the reply emails you create.
This drop-down menu contains a list of all your saved templates. Select one to be used for all the forwarded emails you create.
By clicking on the Mail Templates... button the Templates window will appear:

This is where you manage your email templates - you can modify, import, remove existing, or create new templates here.
Templates contain all of your existing mail templates. If you want to modify or remove an existing template, select it from the list and click on the corresponding button located on the right. (wheel or trash icon)
This window displays a preview of the mail template you have selected in the Template List.
Click on New button to bring up the New Template window:
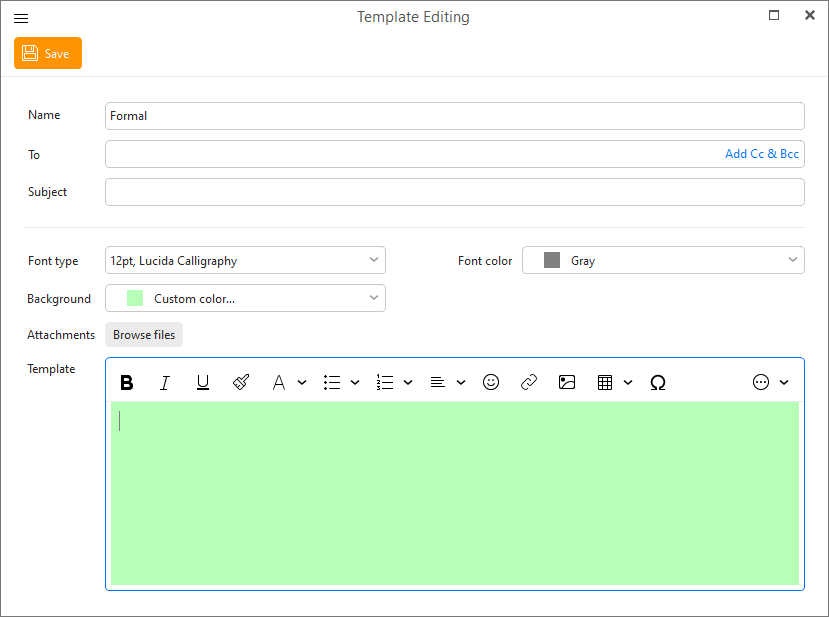
Enter the name of your new template in Name field.
Enter any pre-defined recipients into To, Cc or Bcc fields.
Enter the Subject of your template in to the Subject field.
Font type
Font settings can be changed by clicking on the down-pointing arrow. A standard font settings window will open, where you can adjust the font's size, style (bold, italic...) and type (Arial, Courier New etc.).
Font Color
Select the text color you would like to set for your template by clicking on down pointing arrow in the font color section, and select the preferred font color from the roll-down menu.
Background
You can also preset the background of your mails. Simply click on the down-pointing arrow and select from set of simple color. It is also possible to use custom color by clicking on the Custom color... button and then defining your own color.
If you want to use a picture, click on , click Browse picture... button and select the desired image file from the file explorer.
At the very bottom there is a Template window, where you can edit your template and simultaneously see how will your emails look with the given template.
Click OK to finish creating the new template, which will be added to the template list.
Attachments
Add any files you want to include in your messages by default, this can be useful for inserting your own contact file, CV, public keys for encryption or anything that you want to send out with each message that you cannot include in a signature.
 Import a template from an .emlt file.
 Save a selected template into an .emlt file.
![]() Export selected templates into a QR code which can be scanned by an eM Client mobile app.
Export selected templates into a QR code which can be scanned by an eM Client mobile app.
 Clicking on Edit will bring up the same signature construction window as Add template and will also allow you to modify an existing template.
 To delete an existing template, click on the trash icon.
 Change the order of your templates, the order will be the same when selecting them from the +New button Mail sub-menu in main window.
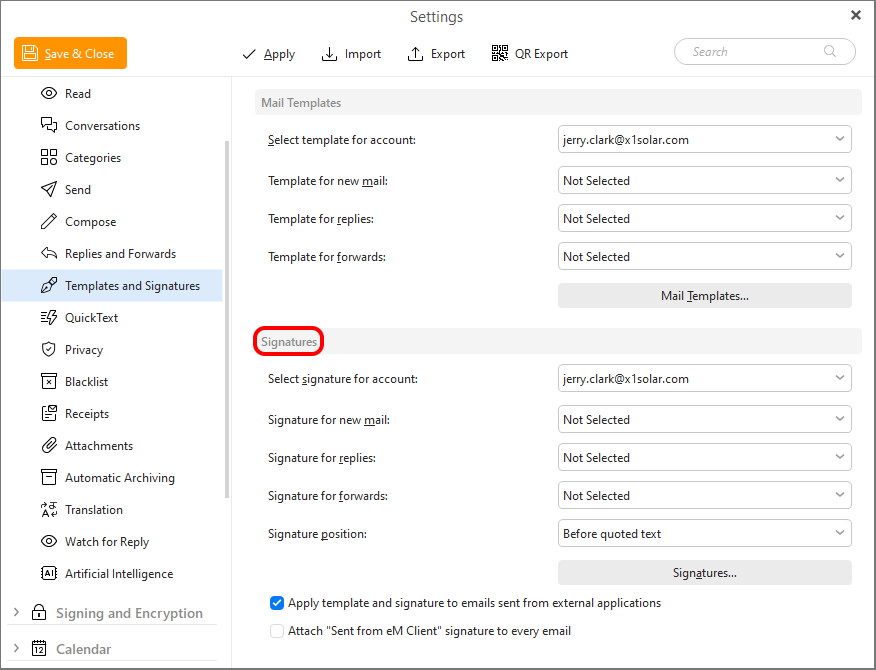
Signatures are texts, pictures and even web links that can be automatically appended to the end of your email messages as your signature. You can create and save any number of signatures in the Signatures window and select a signature to be used for all your future emails.
Select the account for which you want to use the signatures selected in the edit boxes below.
This drop-down menu contains a list of all your saved signatures. Select one to be used for all the new messages you create.
This drop-down menu contains a list of all your saved signatures. Select one to be used for all the reply emails you create.
This drop-down menu contains a list of all your saved signatures. Select one to be used for all the forwarded emails you create.
Specify if the signature should be placed Before quoted text or After quoted text.
By clicking on the Signatures... button the Signatures window will appear:

You can modify and remove or create new signatures here.
Signatures contain all your existing signatures. If you want to modify or remove an existing signature, select it from the list and click the delete button at the top.
Synchronized signature
If you use a Google account, you will also see a signature called 'Synced with Gmail' with the email address next to it. This is your server signature. You can edit it and the signature will be synced to the server, so you can use it in other eM Clients or in Gmail. Signature synchronization is also available for IceWarp and Exchange accounts.
If you already have signatures in the webmail, simply select the signature you want to sync to Gmail (Settings > General) and set the signature for NEW EMAIL USE and ON REPLY/FORWARD USE. After those steps signature will be synced to the eM Client.
Note: it is possible to synchronize only one signature for an account at a time.
In this field will be displayed the preview of the signature you have selected in the Signatures field.
Click on New to bring up the New Signature window:
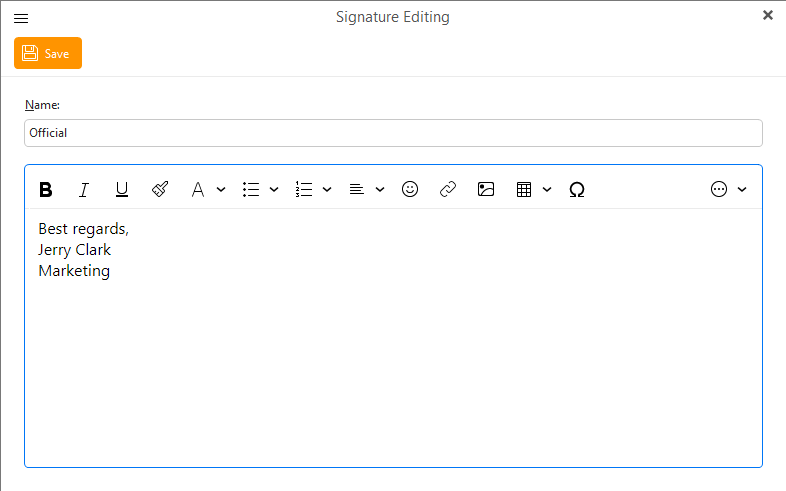
Enter a name for your new signature in the Name field.
In the field below construct a signature as you would in any text editor. Confirm the changes by clicking OK and your new signature will be created and added to the signature list.
Import a signature from an .html file.
Save a selected signature into an .html file.
![]() Export selected signatures into a QR code which can be scanned by an eM Client mobile app.
Export selected signatures into a QR code which can be scanned by an eM Client mobile app.
Clicking on Edit will bring up the same signature construction window as New, which will allow you to edit an existing signature.
 Refresh synchronized signatures.
To delete an existing signature, select it in the Signatures list and click on Delete (trash icon).
Change the order of your signatures, the order will be the same in the compose window and will determine keyboard shortcuts for the signatures.